|
|||||||||||||||||||||
 |
| OpenEXR Documentation |
|
OpenEXR for Adobe Photoshop This document describes how to use the "EXRFormat" plug-in to read and write OpenEXR images using Adobe Photoshop. Supported Operating SystemsThis plug-in has only been tested on MacOS 9.2.2, Mac OS X 10.2.4, and Windows 2000. It should work on MacOS 8.1 and higher, and Windows 98 and higher, but this has not been verified.Supported Host ApplicationsThis plug-in has only been tested with Adobe Photoshop 7.0. It should work with Photoshop 5.5 and higher, but this has not been verified. This plug-in will not work with versions of Photoshop earlier than 5.5.This plug-in will not work correctly with other applications which support
some Photoshop file format plug-ins, such as combustion from Discreet,
or Commotion from Pinnacle Systems.
This plug-in will also not work correctly with Adobe After Effects.
An After Effects-specific plug-in may be included in a future release of
OpenEXR.
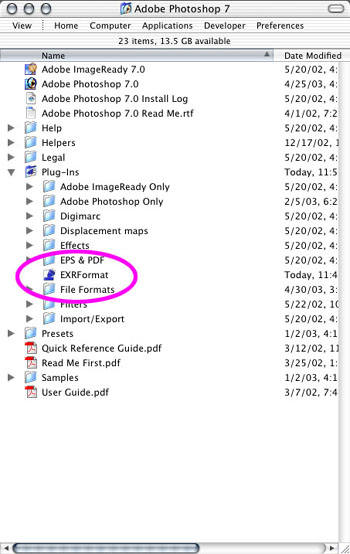
You could also place the EXRFormat plug-in in the "File Formats" folder,
or in any folder inside the "Plug-Ins" folder.
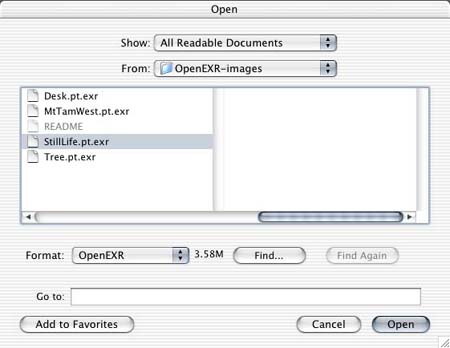
and navigate to a folder containing OpenEXR images. This example
uses the images distributed with the OpenEXR source code release.
Note that when you select an OpenEXR image, the "Format:" menu in the
Open dialog reads "OpenEXR". This lets you know that the plug-in
is installed correctly, and that Photoshop has detected that the file is
in the OpenEXR format.
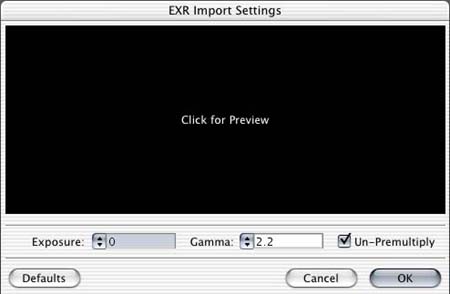
When you click Open in the Open dialog, you will see a new dialog which
allows you to specify how the image is interpreted in Photoshop.
This dialog is necessary because an OpenEXR image can contain many more
colors than you can work with in Photoshop, even in Photoshop's "16 Bits/Channel"
mode. OpenEXR uses floating-point (real number) pixels, and supports
a high dynamic range of pixel values - that is, colors which are brighter
than white. Photoshop uses integer (whole number) pixels, and does
not support colors brighter than white. Because of this, not all
of the pixels in the OpenEXR image will be preserved when the image is
loaded into Photoshop. This dialog lets you control which pixels
are preserved, so that you can work with the image in Photoshop with a
minimal loss of quality.
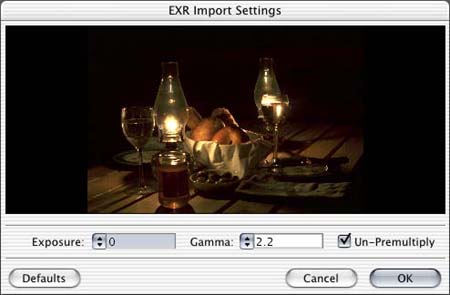
Here is a quick explanation of what these controls do:
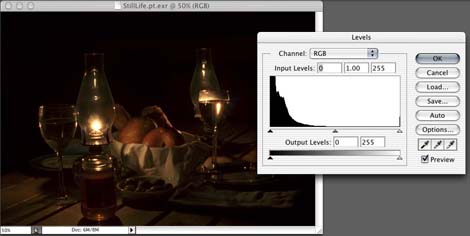
In this preview, we can see that this image has a fairly broad dynamic
range. Much of the image is too dark to see clearly, but the lamps
are so bright that they have been clipped at the default settings.
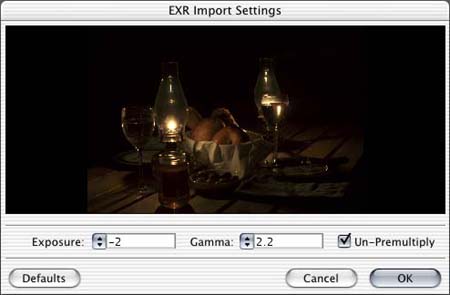
If we darken our exposure, however, we can see that the image does contain
data for those bright areas. Setting the exposure to -2 makes the
image four times darker - the pixels that now appear white are actually
four times brighter than "white".
We could reduce the exposure even further, and reveal more detail in
the highlights, but we would start to lose detail in the dark areas.
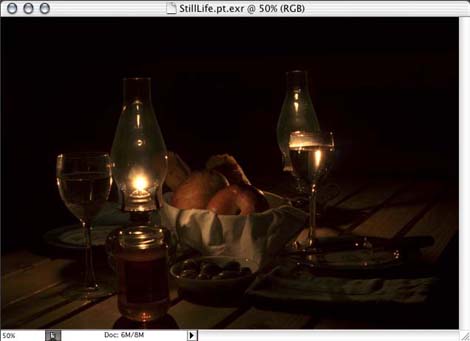
If we click "OK" at this point, the image will be opened in Photoshop at
an exposure of -2, and will appear very dark (as we saw in the preview):
It appears that we have lost a large amount of detail in the image,
but there is actually much more detail here than can be displayed on your
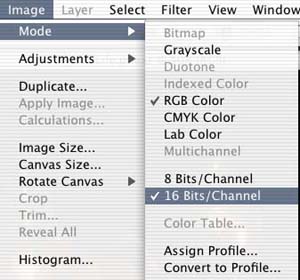
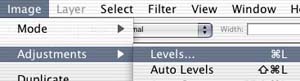
computer screen. Checking the "Image->Mode" menu in Photoshop reveals
that this image is 16 bits per channel, and a computer monitor can only
display 8 bits of information per channel.
To see the hidden detail, we can use the preview feature of Photoshop's
Levels command:
This will create a dialog that will show us the histogram of the image.
Note that there is a large gap between the brightest pixels (the blown-out
highlights) and the majority of the colors in the image.
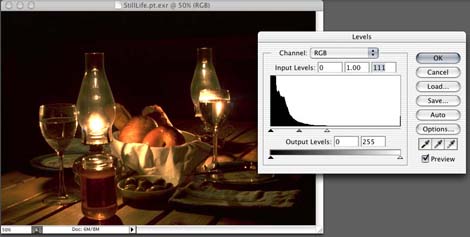
If we adjust the white point so that the majority of the pixels define
the full range of the image, the highlights will be blown out, but more
low-end detail will be revealed.
Note that if you click OK in the Levels dialog, the range adjustment
will be applied to the actual image, and all of the overrange pixel values
will be clipped to white. When working with OpenEXR image in Photoshop,
It's important to be careful that the details you care about are preserved.
Also, note that when working on a 16 bit image in Photoshop, many features
such as painting and layers are unavailable. If you wish to use these
tools, you must convert the image to 8 bits per channel using the "Image->Mode"
menu, which will result in an even greater loss of data. Cautious
use of the exposure and gamma controls in the EXR Import dialog, along
with applying the Levels command before converting to 8 bits, will help
you use all of Photoshop's powerful tools while preserving the colors that
are most important in your image. Of course, some images will simply
contain too much data to be manipulated safely in Photoshop - it's up to
you to ensure that the image you end up with is correct and visually appealing.
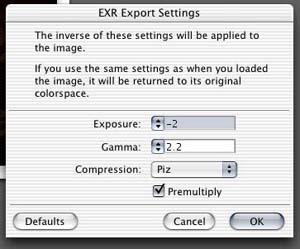
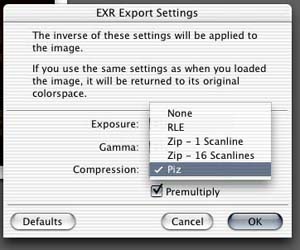
Note that the Exposure and Gamma settings mean something different in
this dialog - they specify the settings that currently apply to the image.
For example, when the image opened in the previous example is saved, this
dialog states that the image has been gamma corrected and darkened.
The plug-in will undo both of these settings before saving the OpenEXR
file. This means that if you use the same settings when you save
an OpenEXR image as when you opened it, the color space of the image will
stay the same. However, any colors which were lost when the image
was opened (clipped highlights or crushed low-end values) will not be restored.
If you are saving a new image, or an image originally in another format,
as an OpenEXR image, the default settings will result in a valid image.
This dialog also allows you to specify the compression scheme used to
save the OpenEXR image. The OpenEXR format supports several methods
of compression, all of them lossless.
|